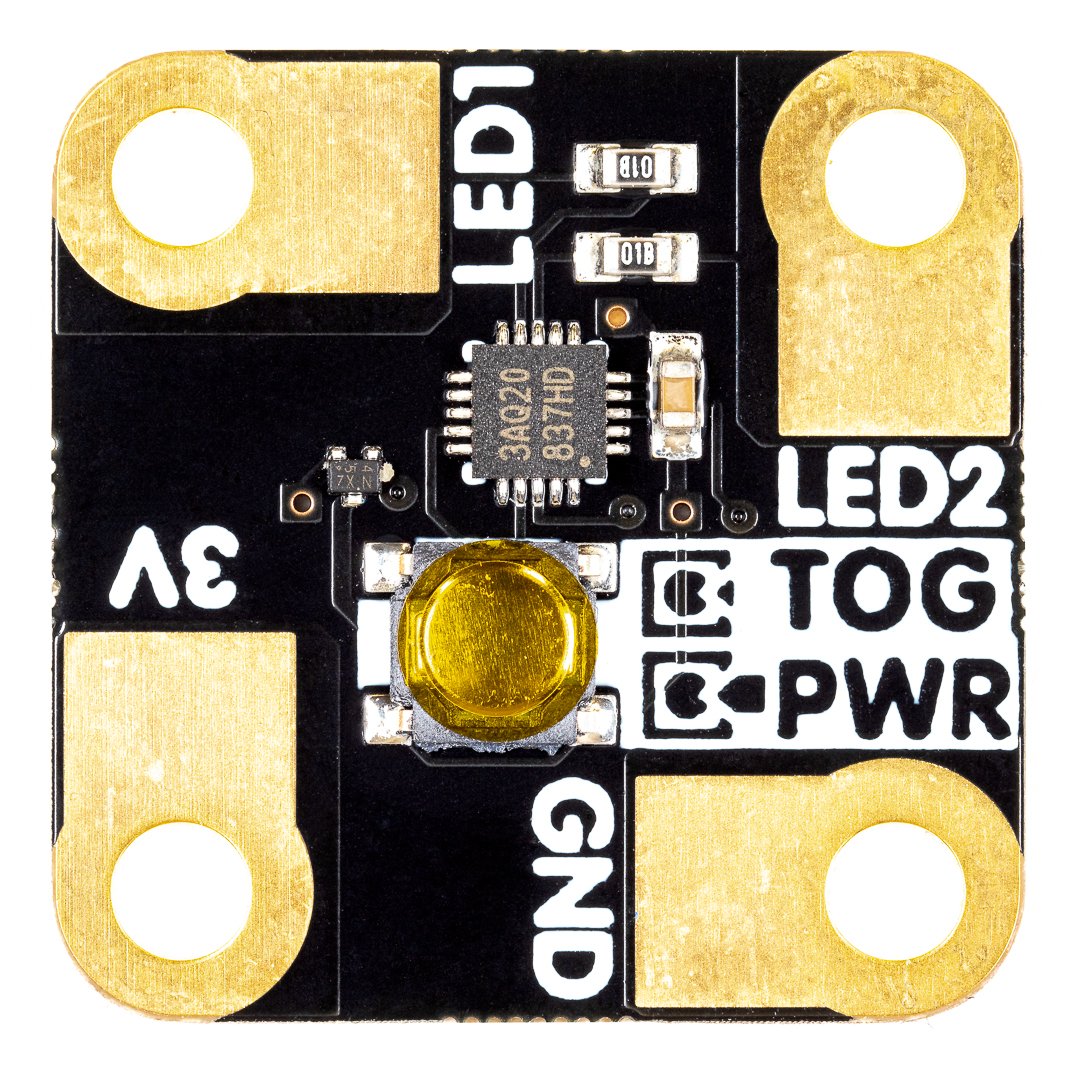
Verbinde ein paar LEDs (und eine Batterie) mit dieser kleinen quadratischen Platine und sieh zu, wie sie blinken! SDB funktioniert auch als praktischer Schalter für Papierbasteleien, Karten und Wearables.
Super Dinky Blinky hat Klemmen, die für eine Vielzahl von Anschlüssen geeignet sind - Kupferband, Krokodilklemmen (auch Krokodilklemmen werden unterstützt), leitende Fäden oder sogar Löten. Die Schaltung wird von der Nuvoton N76E003AQ20 MCU , einem kostengünstigen 8-Bit-Mikrocontroller auf 8501-Basis. Es gibt auch eine Taste - drücken Sie sie lange, um das Board ein- und auszuschalten, oder drücken Sie sie kurz, um zwischen den Mustern zu wechseln.
LEDs , Kupferband und Batterien sind nicht enthalten - Sie finden sie unter der Registerkarte Extras!
Eigenschaften
- Nuvoton N76E003AQ20 Mikrocontroller ( datenblatt )
- Vier Klemmen zum Herstellen von Verbindungen
- Kuppelschalter Einschalttaste
- Abmessungen: 22 x 22 mm
Operation
Wenn eine Stromquelle an den Klemmen 3V und GND angeschlossen ist, schaltet der SDB die LED-Ausgänge in regelmäßigen Abständen nach einem bestimmten Muster ein und aus. Sie können die Taste drücken, um das Muster zu ändern, oder sie ein paar Sekunden lang gedrückt halten, um die Stromversorgung ein- und auszuschalten.
Verbinden Sie die positiven Anoden (+) Ihrer LEDs mit den Klemmen LED1 und LED2 und die Kathoden (-) mit GND.
Eine Beispielschaltung (und ein paar niedliche Geister, die man mit leuchtenden LED-Augen versehen kann) finden Sie in unserem Halloween SDB druckbar . Wenn du Kupferklebeband verwendest, um alles miteinander zu verbinden, empfiehlt Pimoroni dir , mehrere Schichten zu verwenden. Klebe zuerst eine Schicht auf die auf der Schaltung markierten Bereiche, klebe deinen Blinky mit einigen kleineren Klebebandstücken fest und bringe dann den Rest deiner Komponenten mit einer weiteren Schicht an, wobei du das Klebeband bei jedem Schritt gut andrückst. Die Bauteile und die Pads auf dem SDB müssen alle guten Kontakt mit dem Kupfer haben, um richtig zu funktionieren!
Neuprogrammierung des Super Dinky Blinky
Wenn Sie mehr daran interessiert sind, an experimenteller Mikrocontroller-Firmware herumzubasteln, als niedliche Gespenster aus Papier herzustellen, kann der N76E003 mit einem In-Circuit-Programmierer umprogrammiert werden. Während Nuvoton offiziell nur den Keil-Compiler unterstützt, finden Sie eine Portierung des BSP auf den Open-Source-Compiler SDCC unter https://github.com/pimoroni/super-dinky-blinky-fw .
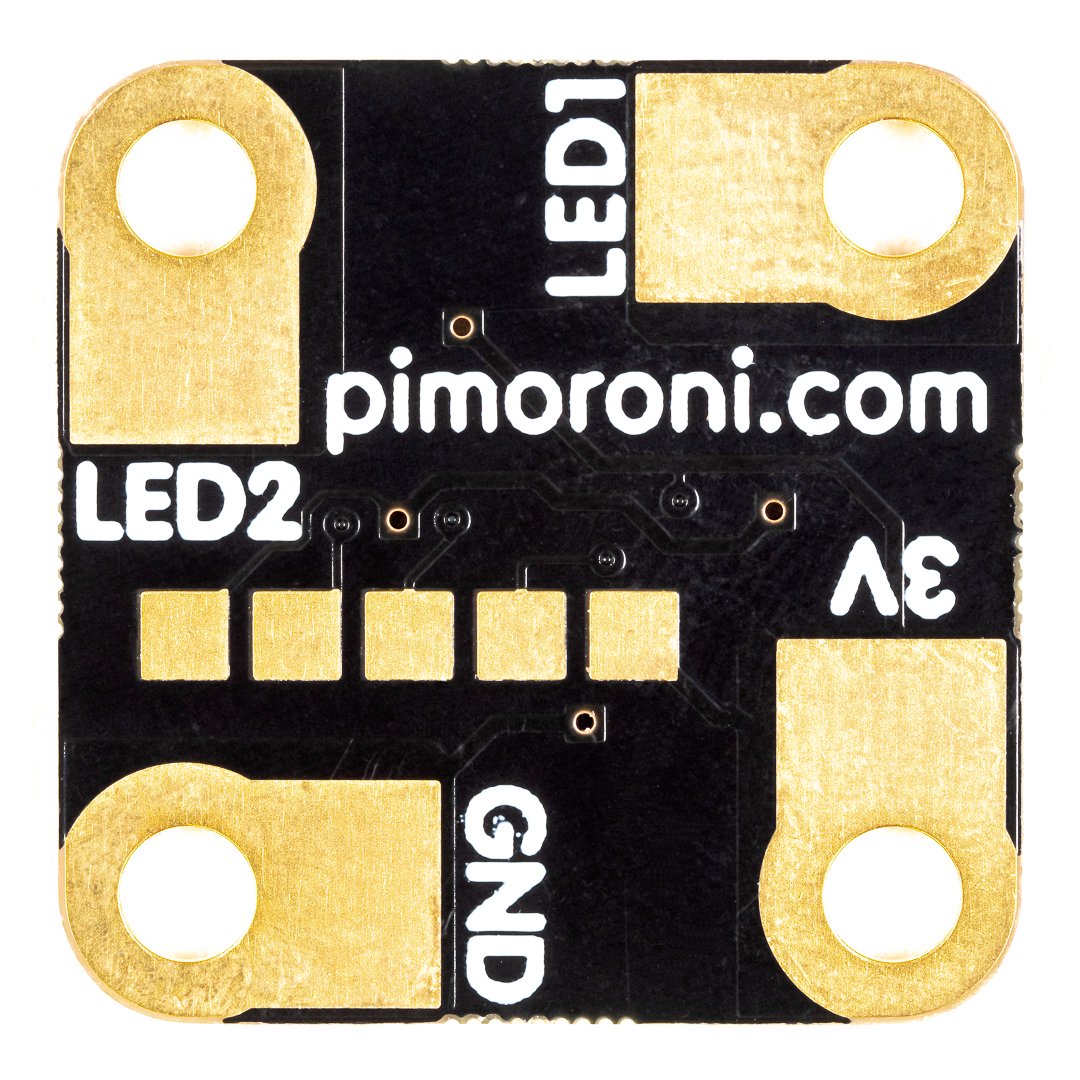
Auf der Unterseite der Platine befinden sich Header für die Bereitstellung der Firmware mit dem Nu-Link-Programmiergerät: https://direct.nuvoton.com/en/nu-link . Die Programmiersoftware ist nur für Windows geeignet. Klicken Sie hier für ein beschriftetes Diagramm der Pads.
Pimoronis Super Dinky Blinky-Firmware ist auch unter dem obigen Github-Link zu finden.
Anmerkungen
- Pimoroni hat Super Dinky Blinky vor einiger Zeit als Teil unserer Suche nach einem preiswerten "Haus"-Mikrocontroller und um herauszufinden, wie man ihn selbst umprogrammieren kann, gebaut - mehr dazu in dieser Blogbeitrag . Sie haben seit diesem Blogbeitrag eine ganze Reihe verschiedener Mikrocontroller (darunter auch von Nuvoton) auf unseren Produktionsplatinen verwendet, so dass dieser kleine Kerl ein wichtiger Teil der Pimoroni-Geschichte ist!
English Description
Connect some LEDs (and a battery) up to this little square board and watch them blink! SDB also functions as a handy power switch for papercrafts, cards and wearables.
Super Dinky Blinky has terminals designed to accommodate a wide variety of connections - copper tape, crocodile clips (alligator also supported), conductive thread, or even soldering. The circuit is driven by the Nuvoton N76E003AQ20 MCU, a low cost, 8-bit 8501-based microcontroller. There's also a button - long press it to turn the board on and off, or short press to switch between patterns.
LEDs, copper tape and batteries are not included - you can find them under the extras tab!
Features
- Nuvoton N76E003AQ20 microcontroller (datasheet)
- Four terminals for making connections
- Dome switch power button
- Measurements: 22 x 22mm
Operation
With a power source hooked up to the 3V and GND terminals, the SDB will periodically turn the LED outputs on and off in a pattern. You can press the button to change the pattern, or hold it down for a couple of seconds to toggle power on and off.
Connect up the positive anodes (+) of your LEDs to the LED1 and LED2 terminals, and the cathodes (-) to GND.
There's an example circuit (and some cute ghosts to give flashy LED eyes to) in our Halloween SDB printable. If you're using copper tape to connect everything together, we'd suggest using several layers - apply one layer to the areas marked on the circuit first, stick your Blinky down with some more smaller bits of tape and then sandwich in the rest of your components with another layer, pressing the tape down well at every step. The components and the pads on the SDB will all need to make good contact with the copper to work properly!
Reprogramming the Super Dinky Blinky
If you're more interested in tinkering with experimental microcontroller firmware than making adorable papercraft ghosts, the N76E003 can be reprogrammed with an In-Circuit Programmer. While Nuvoton only officially supports the Keil compiler, you can find a port of the BSP to the open source SDCC compiler at https://github.com/pimoroni/super-dinky-blinky-fw .
On the base of the board are headers for firmware deployment using the Nu-Link programmer: https://direct.nuvoton.com/en/nu-link. The programming software is Windows-only. Click here for a labelled diagram of the pads.
Pimoronis Super Dinky Blinky firmware can also be found at the Github link above.
Notes
- Pimoroni made Super Dinky Blinky some time ago as part of our quest to find an inexpensive 'house' microcontroller and to figure out the vagaries of reprogramming it ourselves - you can read more it in this blog post. They've used quite a few different microcontrollers (including ones by Nuvoton) on their production boards since that blog post was written, so this little dude is an important part of Pimoroni history!
Sicherheitsangaben
- Lesen Sie die Bedienungsanleitung sorgfältig durch, bevor Sie das Produkt verwenden.
- Stellen Sie sicher, dass alle Montage- und Installationsanweisungen des Herstellers sorgfältig befolgt werden.
- Verwenden Sie das Produkt nur für den vorgesehenen Zweck.
- Die unsachgemäße Nutzung dieses Produkts kann zu schweren Verletzungen oder Sachschäden führen.
- Nicht für Kinder unter 10 Jahren geeignet.
- Bei unsachgemäßer Verwendung besteht eine Verletzungsgefahr.
- Dieses Produkt entspricht den geltenden Sicherheitsanforderungen der Europäischen Union.
- Dieses Produkt wurde gemäß der GPSR geprüft, die sicherstellt, dass alle relevanten Sicherheitsanforderungen für Konsumgüter eingehalten werden.
Nachverfolgbarkeitsinformationen
Jedes Produkt verfügt über eines oder mehrere der folgenden Merkmale:
- Ein CE-Kennzeichen, das die Einhaltung der Sicherheits-, Gesundheits- und Umweltschutzanforderungen der Europäischen Union anzeigt.
- Eine eindeutige Serien- oder Chargennummer, um die Nachverfolgbarkeit zu gewährleisten und bei Bedarf Rückrufaktionen zu unterstützen.
- Hersteller- und Importeurangaben für den Kundensupport und Sicherheitsanfragen.
Überwachung und Berichterstattung von Vorfällen
Für den unwahrscheinlichen Fall eines Produktproblems haben wir Verfahren implementiert, um:
- Kundenbeschwerden zeitnah bearbeiten.
- Schwerwiegende Vorfälle über das EU Safety Gate/RAPEX-System melden.
- Mit den Marktüberwachungsbehörden zusammenarbeiten, um die öffentliche Sicherheit zu gewährleisten.
Kontakt:
- Email: support [@] pi3g.com
- Telefon: 0341 / 392 858 40
Dieses Produkt ist vollständig mit allen geltenden EU-Vorschriften konform, um die Sicherheit unserer geschätzten Kunden zu gewährleisten.


