Beschreibung
Es ist halb USB Key, halb Adafruit QT Py und eine Menge RP2040... es ist Trinkey QT2040, die Platine mit einem RP2040 Herz und Stemma QT Beinen. Die Leute lieben den QT Py 2040 von Adafruit, aber vielleicht wollen Sie etwas Plug-and-Play. Also dachten sie sich, wie wäre es, wenn sie etwas herstellen würden, das direkt an den USB-Anschluss deines Computers angeschlossen werden kann? Und das ist es, was sie sich ausgedacht haben!
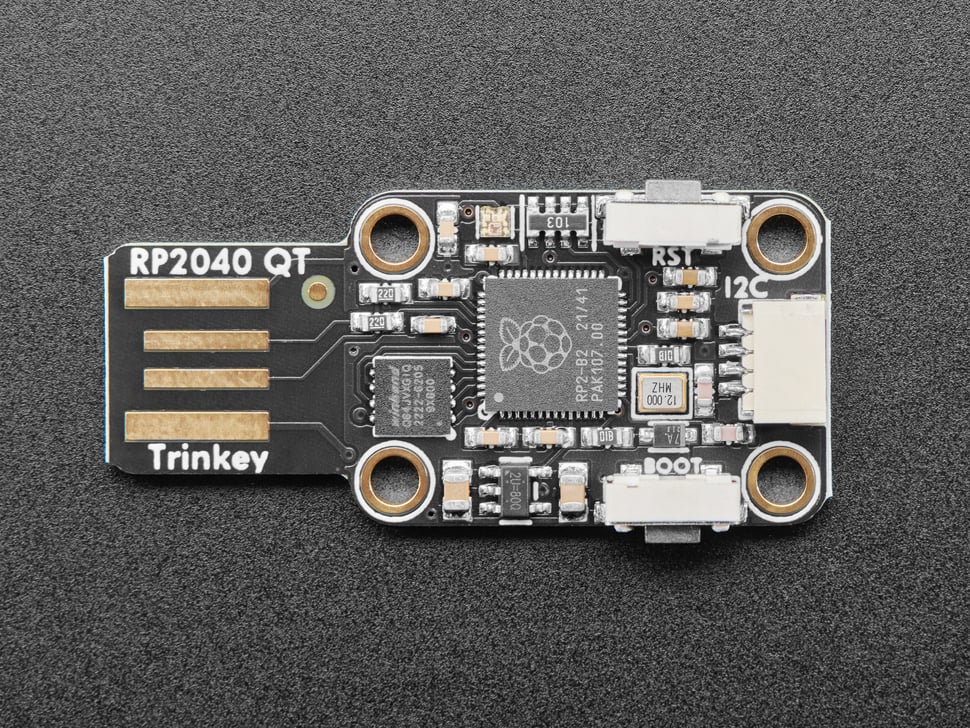
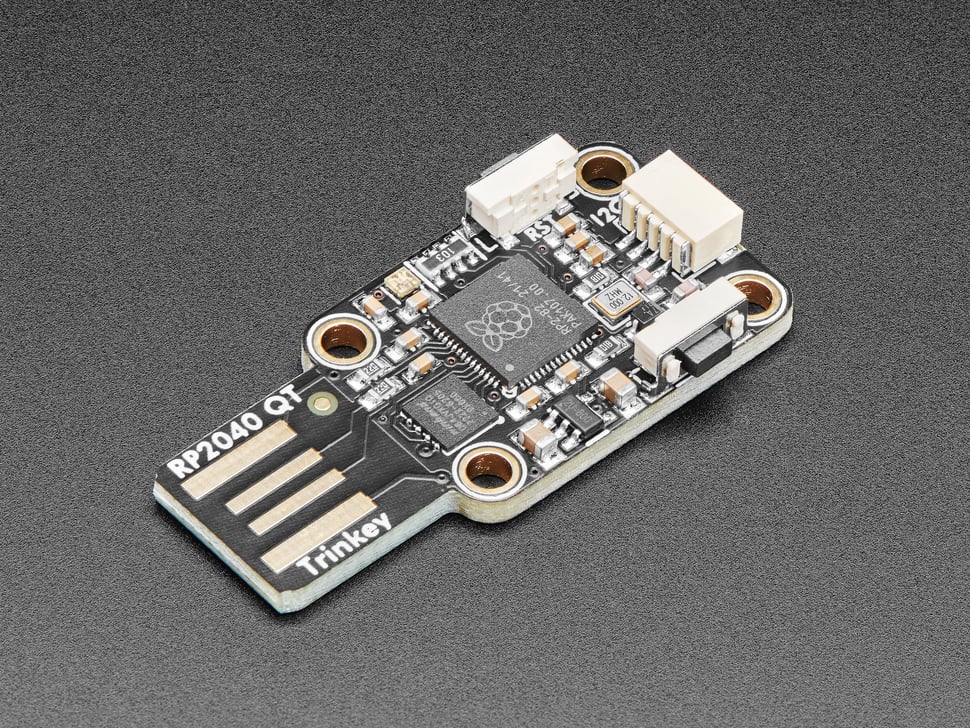
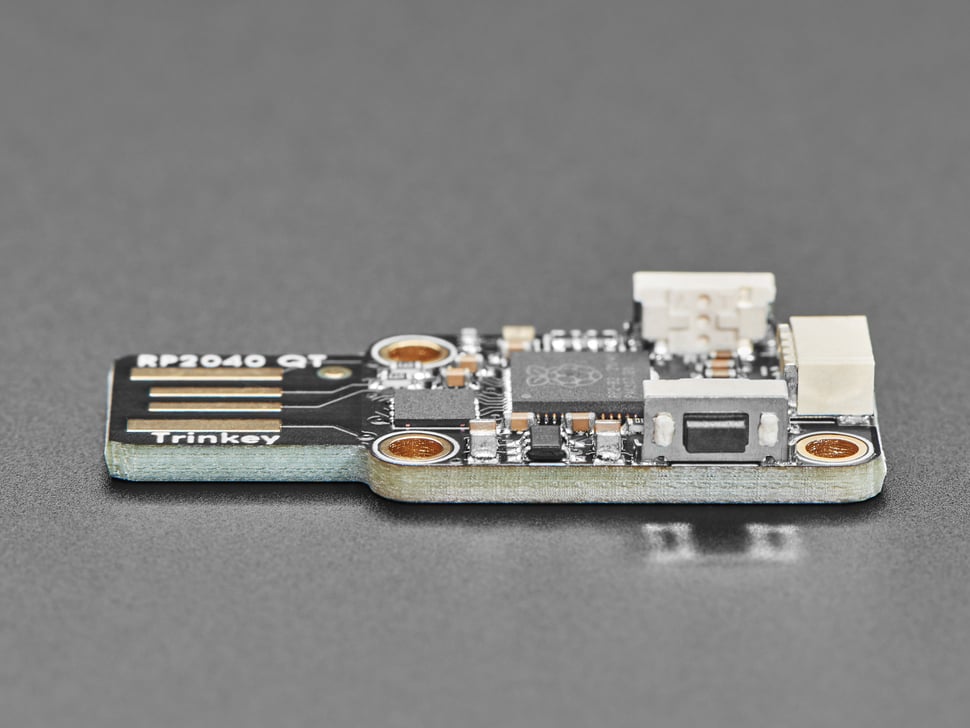
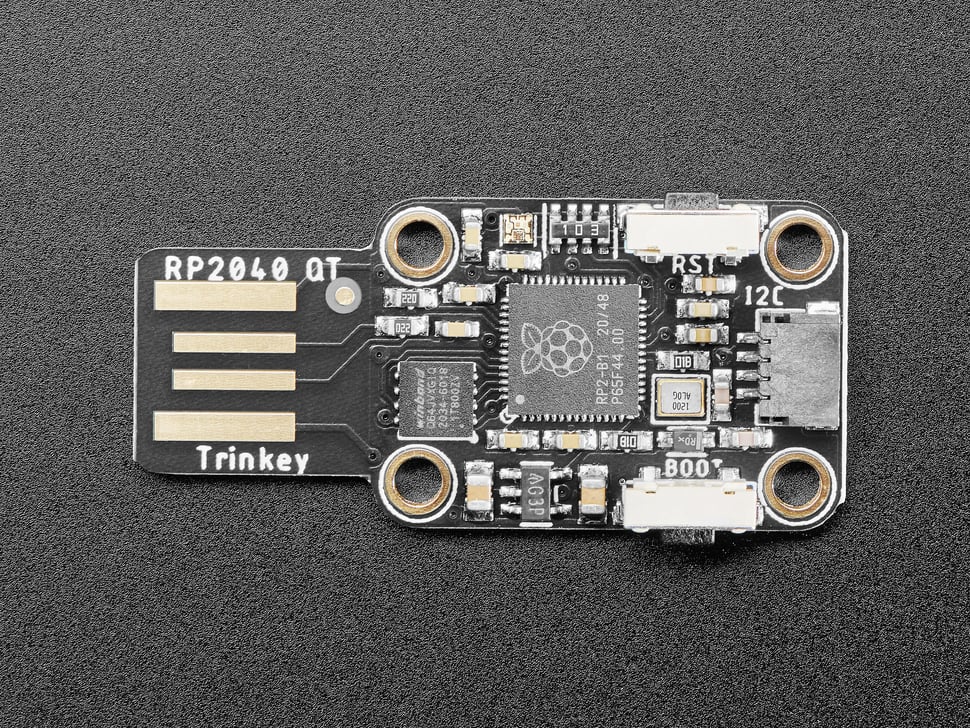
Die Platine ist so konzipiert, dass sie in jeden USB-A-Anschluss eines Computers oder Laptops passt. Auf der Platine befindet sich ein RP2040-Mikrocontroller mit gerade genug Schaltkreisen, um ihn bei Laune zu halten. Es gibt einen RGB NeoPixel, eine Reset- und Bootloader- oder Benutzertaste und einen STEMMA QT Port am Ende. Das war's!
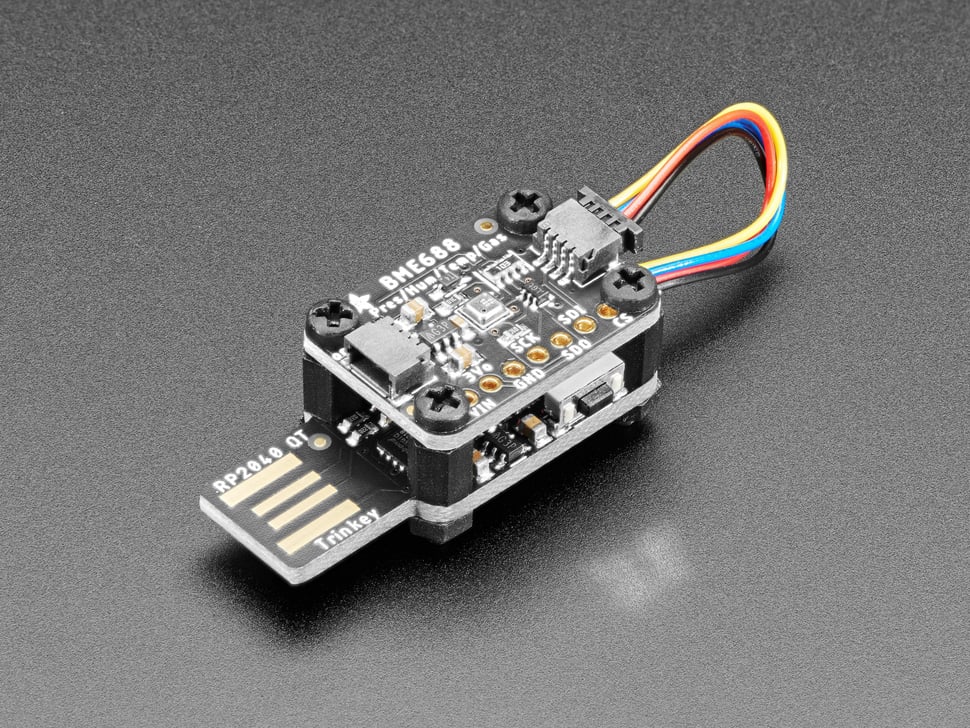
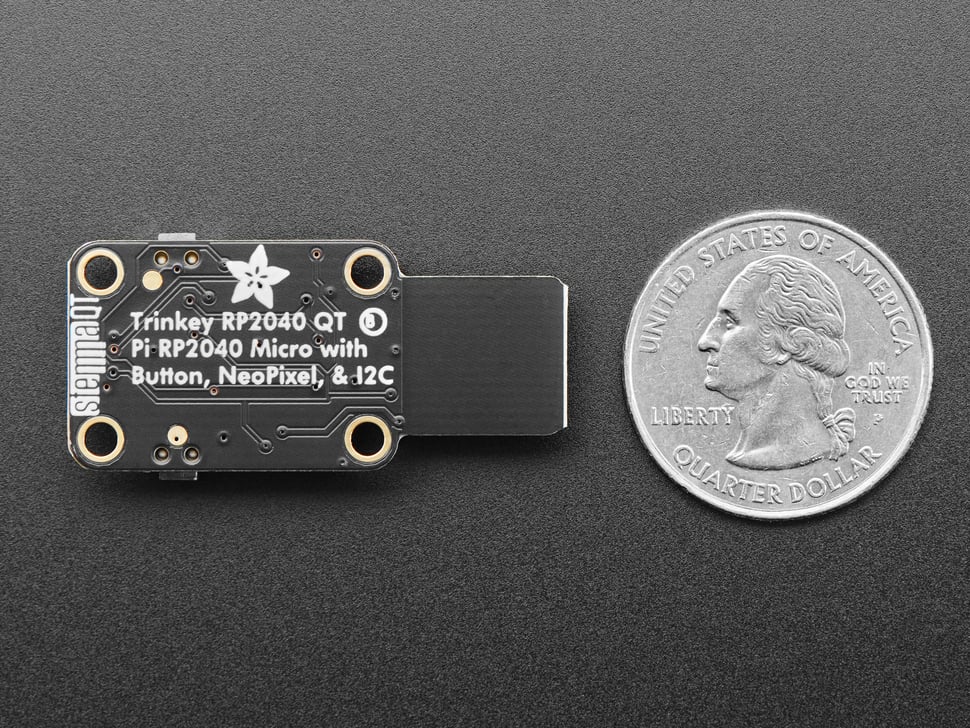
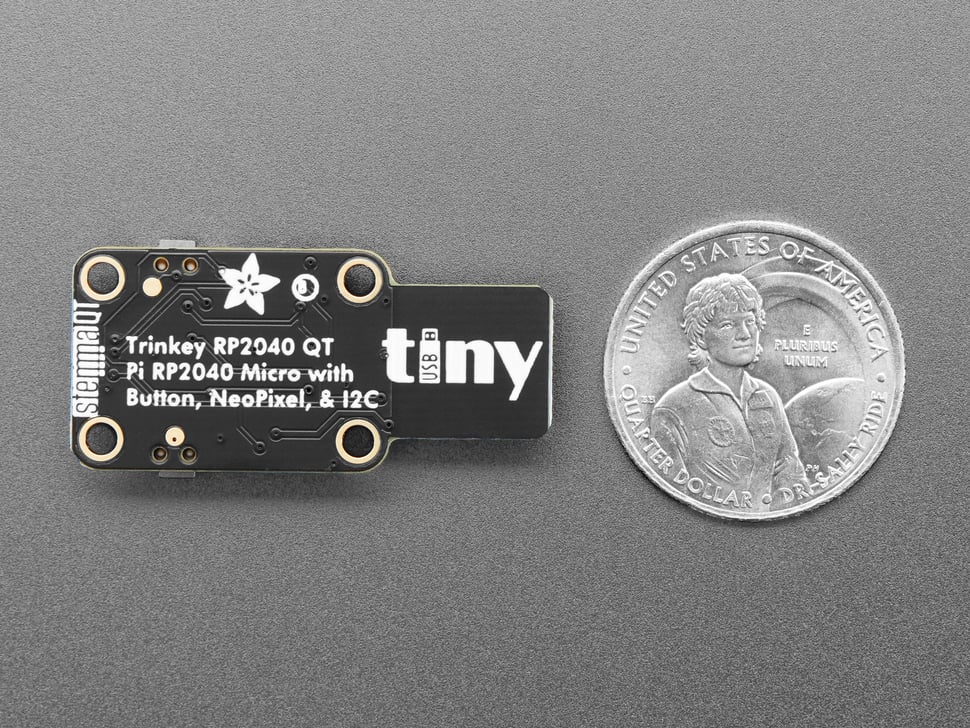
Mit einer Größe von 1,0" x 0,7" und vier Befestigungslöchern können Sie so gut wie jede unserer QT-Platinen anbringen (einige sind etwas größer, also überprüfen Sie, ob die Löcher an den gleichen Stellen sind). Verwenden Sie dazu Abstandshalter und Schrauben der Größe M2,5, mindestens jedoch 2 diagonale. Verwenden Sie dann ein kurzes QT-Kabel, und Sie haben einen kundenspezifischen Sensor Trinkey für jeden Sensorzweck.
Das Board wird mit 8 MB QSPI-Flash-Speicher geliefert, so dass Sie alle unsere CircuitPython-Treiber auf der Diskette unterbringen können!
Plug-and-play STEMMA QT
Einer der Stars dieses Boards ist unser Lieblingsanschluss - der STEMMA QT, ein verkettbarer I2C-Anschluss, der mit allen unseren STEMMA QT-Sensoren und -Zubehörteilen verwendet werden kann. Dieser Anschluss bedeutet, dass Sie keine Lötarbeiten durchführen müssen, um loszulegen.
Was kann man an den QT-Anschluss anschließen? Wie wäre es mit OLEDs! Trägheitsmessgeräte! Sensoren in Hülle und Fülle. Alles Plug-and-Play dank des innovativen kettbaren Designs: SparkFun Qwiic-kompatible STEMMA QT-Stecker für den I2C-Bus, so dass Sie nicht einmal löten müssen. Stecken Sie einfach ein kompatibles Kabel ein und verbinden Sie es mit der MCU Ihrer Wahl, und schon können Sie eine Software laden und Licht messen.
Verwenden Sie alle SparkFun Qwiic-Boards! Seeed Grove I2C Boards funktionieren ebenfalls mit diesem Adapterkabel.
Software-Unterstützung
Zum Zeitpunkt der Markteinführung gibt es keine Arduino Core Unterstützung für den Chip auf diesem Board. Es gibt eine großartige C/C++-Unterstützung, eine offizielle MicroPython-Portierung und eine CircuitPython-Portierung! Adafruit empfiehlt natürlich CircuitPython, weil sie der Meinung sind, dass es der einfachste Weg ist, um anzufangen, und dass es die meisten ihrer Treiber, Displays, Sensoren und mehr unterstützt, und zwar von Anfang an, so dass Sie mit ihren CircuitPython-Projekten und -Tutorials weiterarbeiten können.
Der RP2040 hat zwar viel Onboard-RAM (264KB), aber keinen eingebauten FLASH-Speicher. Dieser wird stattdessen von einem externen QSPI-Flash-Chip bereitgestellt. Auf diesem Board befinden sich 8MB, die sich das laufende Programm und der von MicroPython oder CircuitPython verwendete Dateispeicher teilen. Bei Verwendung von C/C++ steht der gesamte Flash-Speicher zur Verfügung, bei Verwendung von Python verbleiben etwa 7 MB für Code, Dateien, Bilder, Schriftarten usw.
- Das Hauptgehäuse hat die gleiche Größe/Montagebohrungen wie die meisten unserer Stemma QT Boards (1,0" x 0,7" mit M2,5 Bohrungen)
- USB-Typ-A-Stecker mit extradicker Leiterplatte, die in einen USB-Host-Anschluss passt
- RP2040 32-Bit Cortex M0+ Dual-Core mit ~125 MHz bei 3,3 V Logik und Leistung
- 264 KB RAM
- 8 MB SPI FLASH-Chip zum Speichern von Dateien und CircuitPython/MicroPython-Code. Kein EEPROM
- Native USB-Unterstützung durch jedes Betriebssystem - kann als serielle USB-Konsole, MIDI, Tastatur/Maus-HID und sogar als kleines Laufwerk zum Speichern von Python-Skripten verwendet werden.
- Kann mit MicroPython oder CircuitPython verwendet werden
- Eingebaute RGB NeoPixel LED
- STEMMA QT / Qwiic-Anschluss für I2C-Konnektivität
- 3,3-V-Regler mit 600-mA-Spitzenausgang
- 12 MHz Quarz
- Reset-Taste und Bootloader-Auswahltasten für schnelle Neustarts (kein Ausstecken und Wiedereinstecken, um den Code neu zu starten)
- Der Bootloader-Knopf kann auch sicher in 'User'-Code verwendet werden
Über den RP2040
Im Inneren des RP2040 befindet sich ein 'permanenter ROM' USB UF2 Bootloader. Das bedeutet, wenn Sie eine neue Firmware programmieren wollen, können Sie den BOOT-Knopf gedrückt halten, während Sie das Gerät in den USB-Anschluss stecken (oder den RUN/Reset-Pin auf Masse ziehen) und es erscheint als USB-Laufwerk, auf das Sie die Firmware ziehen können. Leute, die Adafruit-Produkte verwenden, werden dies sehr vertraut finden - wir verwenden diese Technik auf allen unseren nativen USB-Boards. Achten Sie nur darauf, dass Sie nicht auf den Reset-Knopf doppelklicken, sondern den BOOT-Knopf während des Bootens gedrückt halten, um den Bootloader zu starten!
Der RP2040 ist ein leistungsfähiger Chip, der die Taktrate unseres M4 (SAMD51) hat und zwei Kerne, die unserem M0 (SAMD21) entsprechen. Da es sich um einen M0-Chip handelt, verfügt er nicht über eine Fließkommaeinheit oder DSP-Hardwareunterstützung - wenn Sie also etwas mit umfangreichen Fließkommaberechnungen machen, wird dies in Software erledigt und ist daher nicht so schnell wie ein M4. Bei vielen anderen Rechenaufgaben erreichen Sie annähernd M4-Geschwindigkeit!
Description
It's half USB Key, half Adafruit QT Py and a lot of RP2040.... it's Trinkey QT2040, the board with an RP2040 heart and Stemma QT legs. People love the QT Py 2040 from Adafruit, but maybe you want something plug-and-play. So they thought, how about making something that plugs directly into your computer's USB port? And that's what they came up with!
The board is designed to fit into any USB-A port on a computer or laptop. On the board is an RP2040 microcontroller with just enough circuitry to keep it happy. There's an RGB NeoPixel, a reset and bootloader or user button, and a STEMMA QT port on the end. That's it.
Measuring 1.0" x 0.7" with four mounting holes, you can attach just about any of our QT boards (some are slightly larger, so check to make sure the holes are in the same places). To do this, use M2.5 spacers and screws, but at least 2 diagonal ones. Then use a short QT cable, and you have a custom sensor Trinkey for any sensor purpose.
The board comes with 8 MB of QSPI flash memory, so you can put all our CircuitPython drivers on the disk!
Plug-and-play STEMMA QT
One of the stars of this board is our favorite connector - the STEMMA QT, a daisy-chainable I2C connector that can be used with all of our STEMMA QT sensors and accessories. This connector means you don't have to do any soldering to get started.
What can you connect to the QT connector? How about OLEDs! Inertial measurement devices! Sensors galore. It's all plug-and-play thanks to the innovative warpable design: SparkFun Qwiic-compatible STEMMA QT connectors for the I2C bus, so you don't even have to solder. Just plug in a compatible cable and connect it to the MCU of your choice, and you're ready to load software and measure light.
Use all SparkFun Qwiic boards! Seeed Grove I2C boards will also work with this adapter cable.
Software support
At launch, there is no Arduino Core support for the chip on this board. There is great C/C++ support, an official MicroPython port, and a CircuitPython port! Adafruit, of course, recommends CircuitPython because they feel it's the easiest way to get started, and it supports most of their drivers, displays, sensors, and more, right out of the gate, so you can get on with their CircuitPython projects and tutorials.
The RP2040 has plenty of onboard RAM (264KB), but no built-in FLASH memory. This is instead provided by an external QSPI flash chip. There is 8MB on this board, shared between the running program and the file memory used by MicroPython or CircuitPython. When using C/C++, all of the flash memory is available; when using Python, about 7MB remains for code, files, images, fonts, etc.
- The main package is the same size/mounting holes as most of our Stemma QT boards (1.0" x 0.7" with M2.5 holes)
- USB type A connector with extra-thick PCB that fits into a USB host port
- RP2040 32-bit Cortex M0+ dual-core with ~125 MHz at 3.3 V logic and power
- 264 KB RAM
- 8 MB SPI FLASH chip for storing files and CircuitPython/MicroPython code. No EEPROM
- Native USB support by any operating system - can be used as a USB serial console, MIDI, keyboard/mouse HID, and even as a small drive for storing Python scripts.
- Can be used with MicroPython or CircuitPython
- Built-in RGB NeoPixel LED
- STEMMA QT / Qwiic connector for I2C connectivity
- 3.3 V regulator with 600 mA peak output
- 12 MHz crystal
- Reset button and bootloader selection buttons for quick reboots (no unplugging and re-plugging to restart code)
- Bootloader button can also be safely used in 'user' code
About the RP2040
Inside the RP2040 is a 'permanent ROM' USB UF2 bootloader. This means that if you want to program new firmware, you can hold down the BOOT button while plugging it into the USB port (or pulling the RUN/Reset pin to ground) and it will appear as a USB drive that you can pull the firmware onto. People who use Adafruit products will find this very familiar - we use this technique on all of our native USB boards. Just make sure that you don't double-click the reset button, but hold down the BOOT button while booting to start the bootloader!
The RP2040 is a powerful chip that has the clock speed of our M4 (SAMD51) and two cores equivalent to our M0 (SAMD21). Since it's an M0 chip, it doesn't have a floating point unit or DSP hardware support - so if you're doing anything with extensive floating point calculations, it's done in software and therefore isn't as fast as an M4. For many other computing tasks, you can get close to M4 speed!
Sicherheitsangaben
- Lesen Sie die Bedienungsanleitung sorgfältig durch, bevor Sie das Produkt verwenden.
- Stellen Sie sicher, dass alle Montage- und Installationsanweisungen des Herstellers sorgfältig befolgt werden.
- Verwenden Sie das Produkt nur für den vorgesehenen Zweck.
- Die unsachgemäße Nutzung dieses Produkts kann zu schweren Verletzungen oder Sachschäden führen.
- Nicht für Kinder unter 10 Jahren geeignet.
- Bei unsachgemäßer Verwendung besteht eine Verletzungsgefahr.
- Dieses Produkt entspricht den geltenden Sicherheitsanforderungen der Europäischen Union.
- Dieses Produkt wurde gemäß der GPSR geprüft, die sicherstellt, dass alle relevanten Sicherheitsanforderungen für Konsumgüter eingehalten werden.
Nachverfolgbarkeitsinformationen
Jedes Produkt verfügt über eines oder mehrere der folgenden Merkmale:
- Ein CE-Kennzeichen, das die Einhaltung der Sicherheits-, Gesundheits- und Umweltschutzanforderungen der Europäischen Union anzeigt.
- Eine eindeutige Serien- oder Chargennummer, um die Nachverfolgbarkeit zu gewährleisten und bei Bedarf Rückrufaktionen zu unterstützen.
- Hersteller- und Importeurangaben für den Kundensupport und Sicherheitsanfragen.
Überwachung und Berichterstattung von Vorfällen
Für den unwahrscheinlichen Fall eines Produktproblems haben wir Verfahren implementiert, um:
- Kundenbeschwerden zeitnah bearbeiten.
- Schwerwiegende Vorfälle über das EU Safety Gate/RAPEX-System melden.
- Mit den Marktüberwachungsbehörden zusammenarbeiten, um die öffentliche Sicherheit zu gewährleisten.
Kontakt:
- Email: support [@] pi3g.com
- Telefon: 0341 / 392 858 40
Dieses Produkt ist vollständig mit allen geltenden EU-Vorschriften konform, um die Sicherheit unserer geschätzten Kunden zu gewährleisten.

