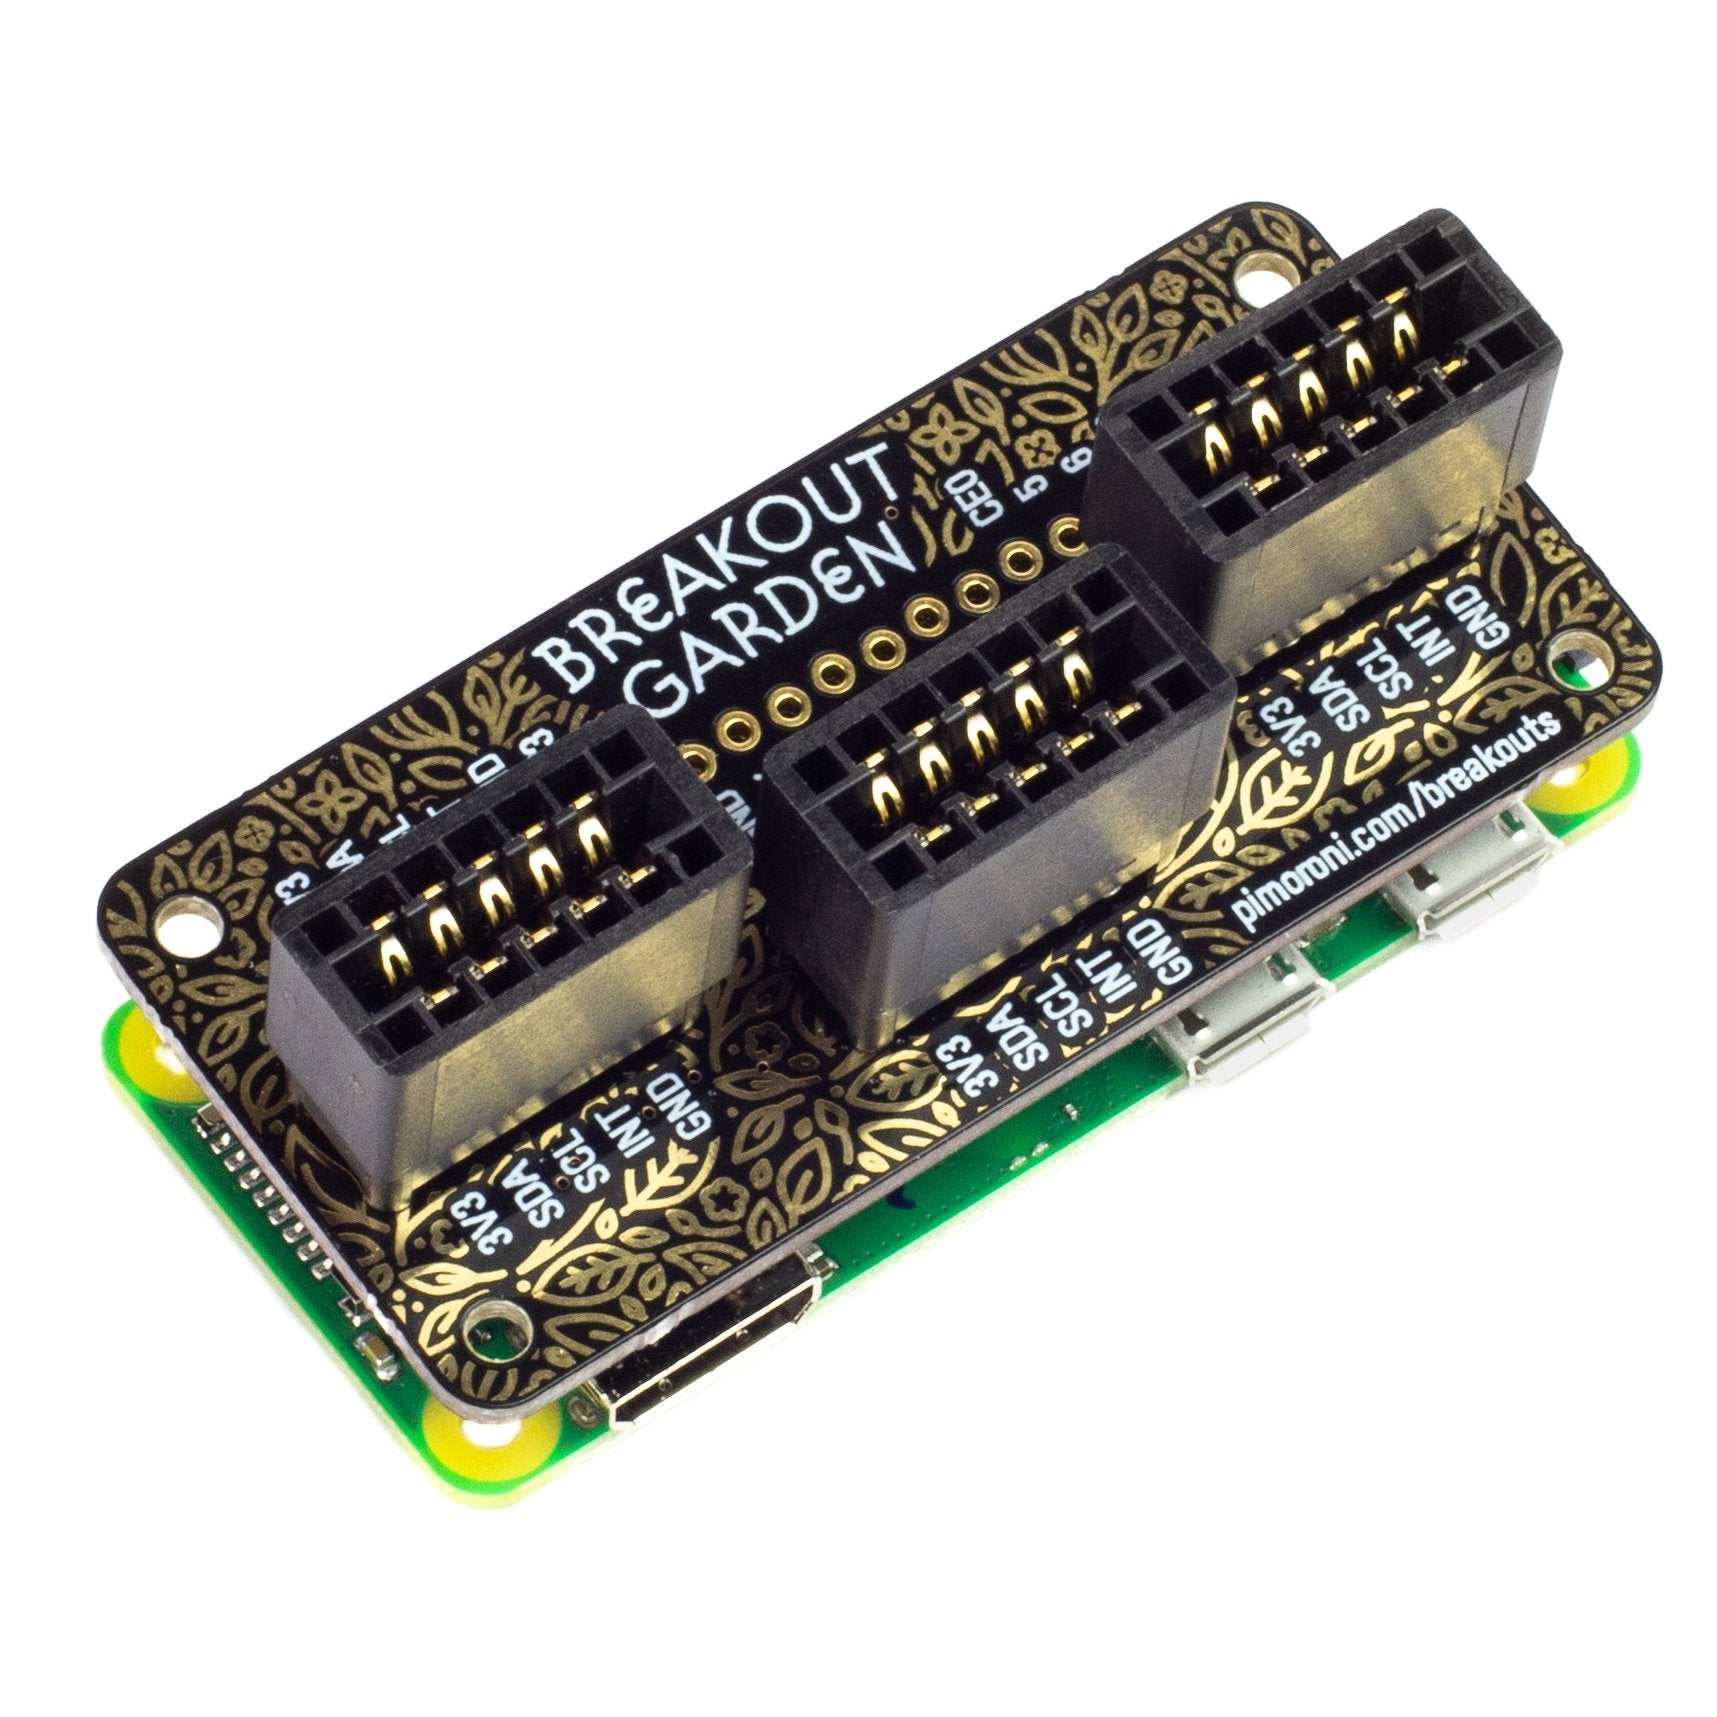
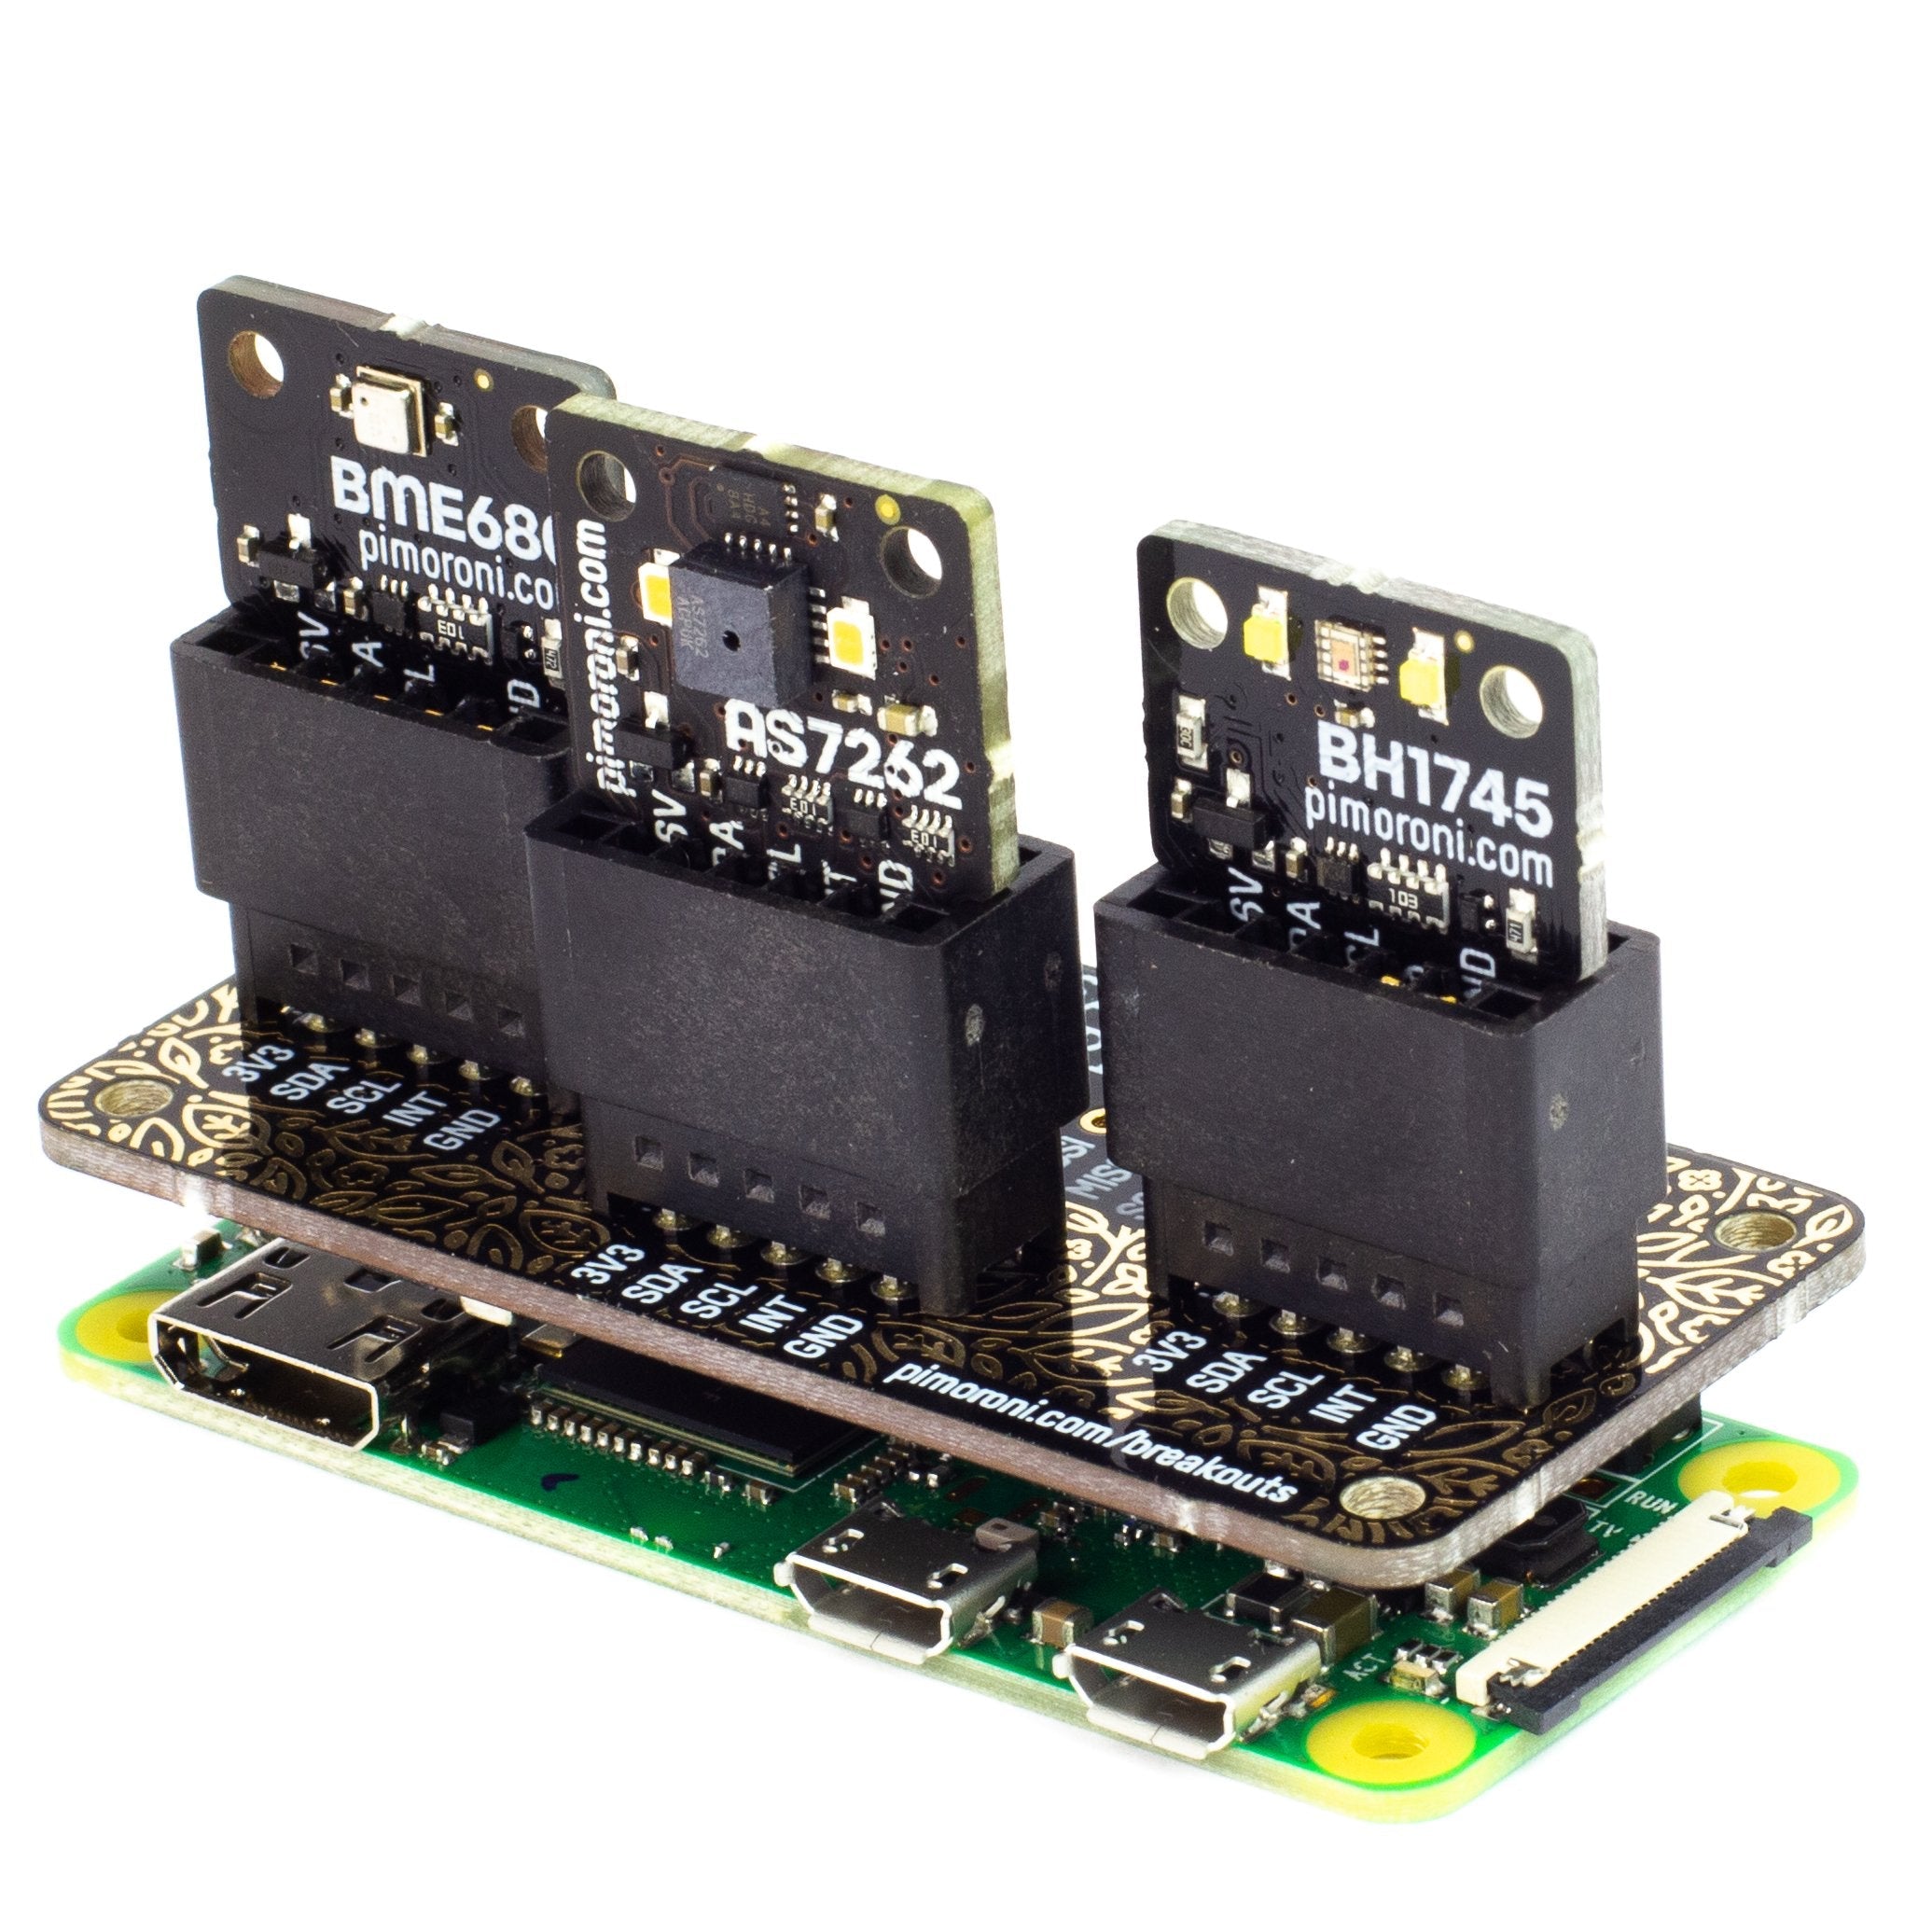
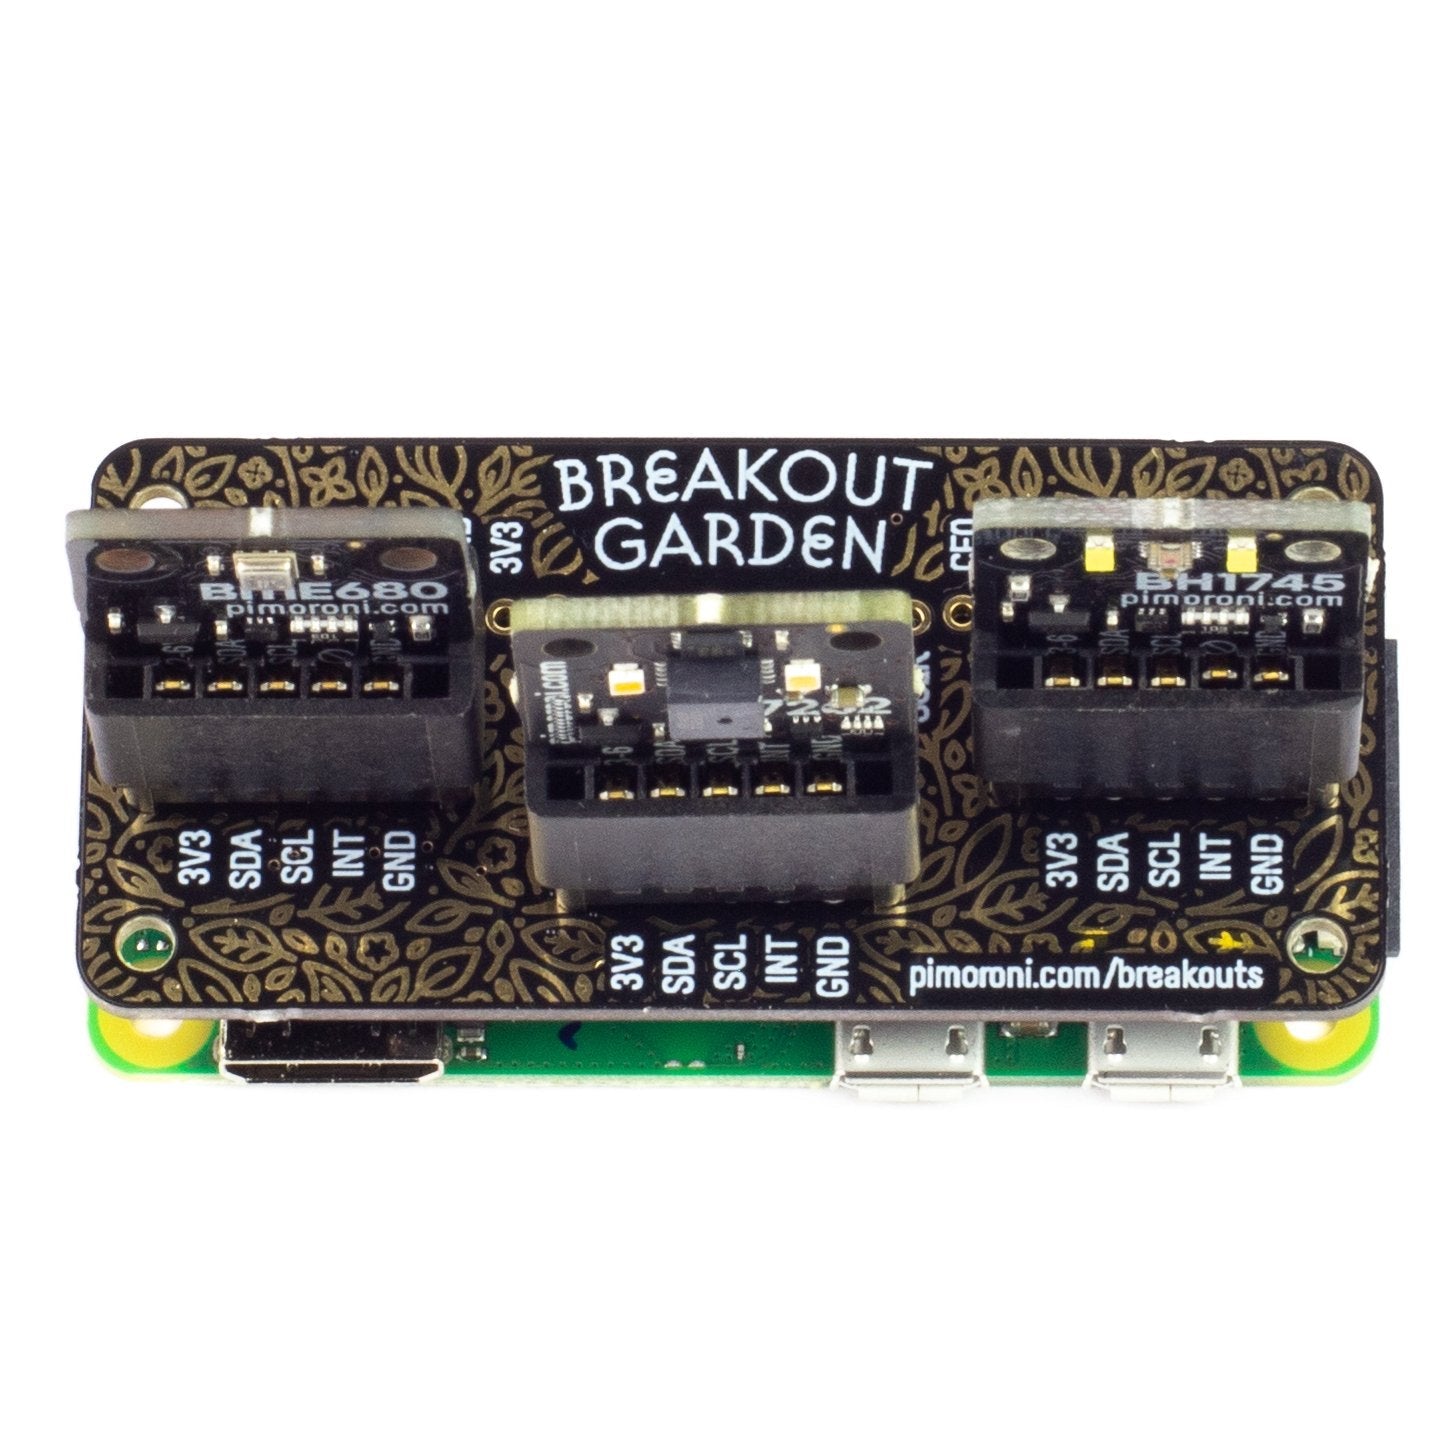
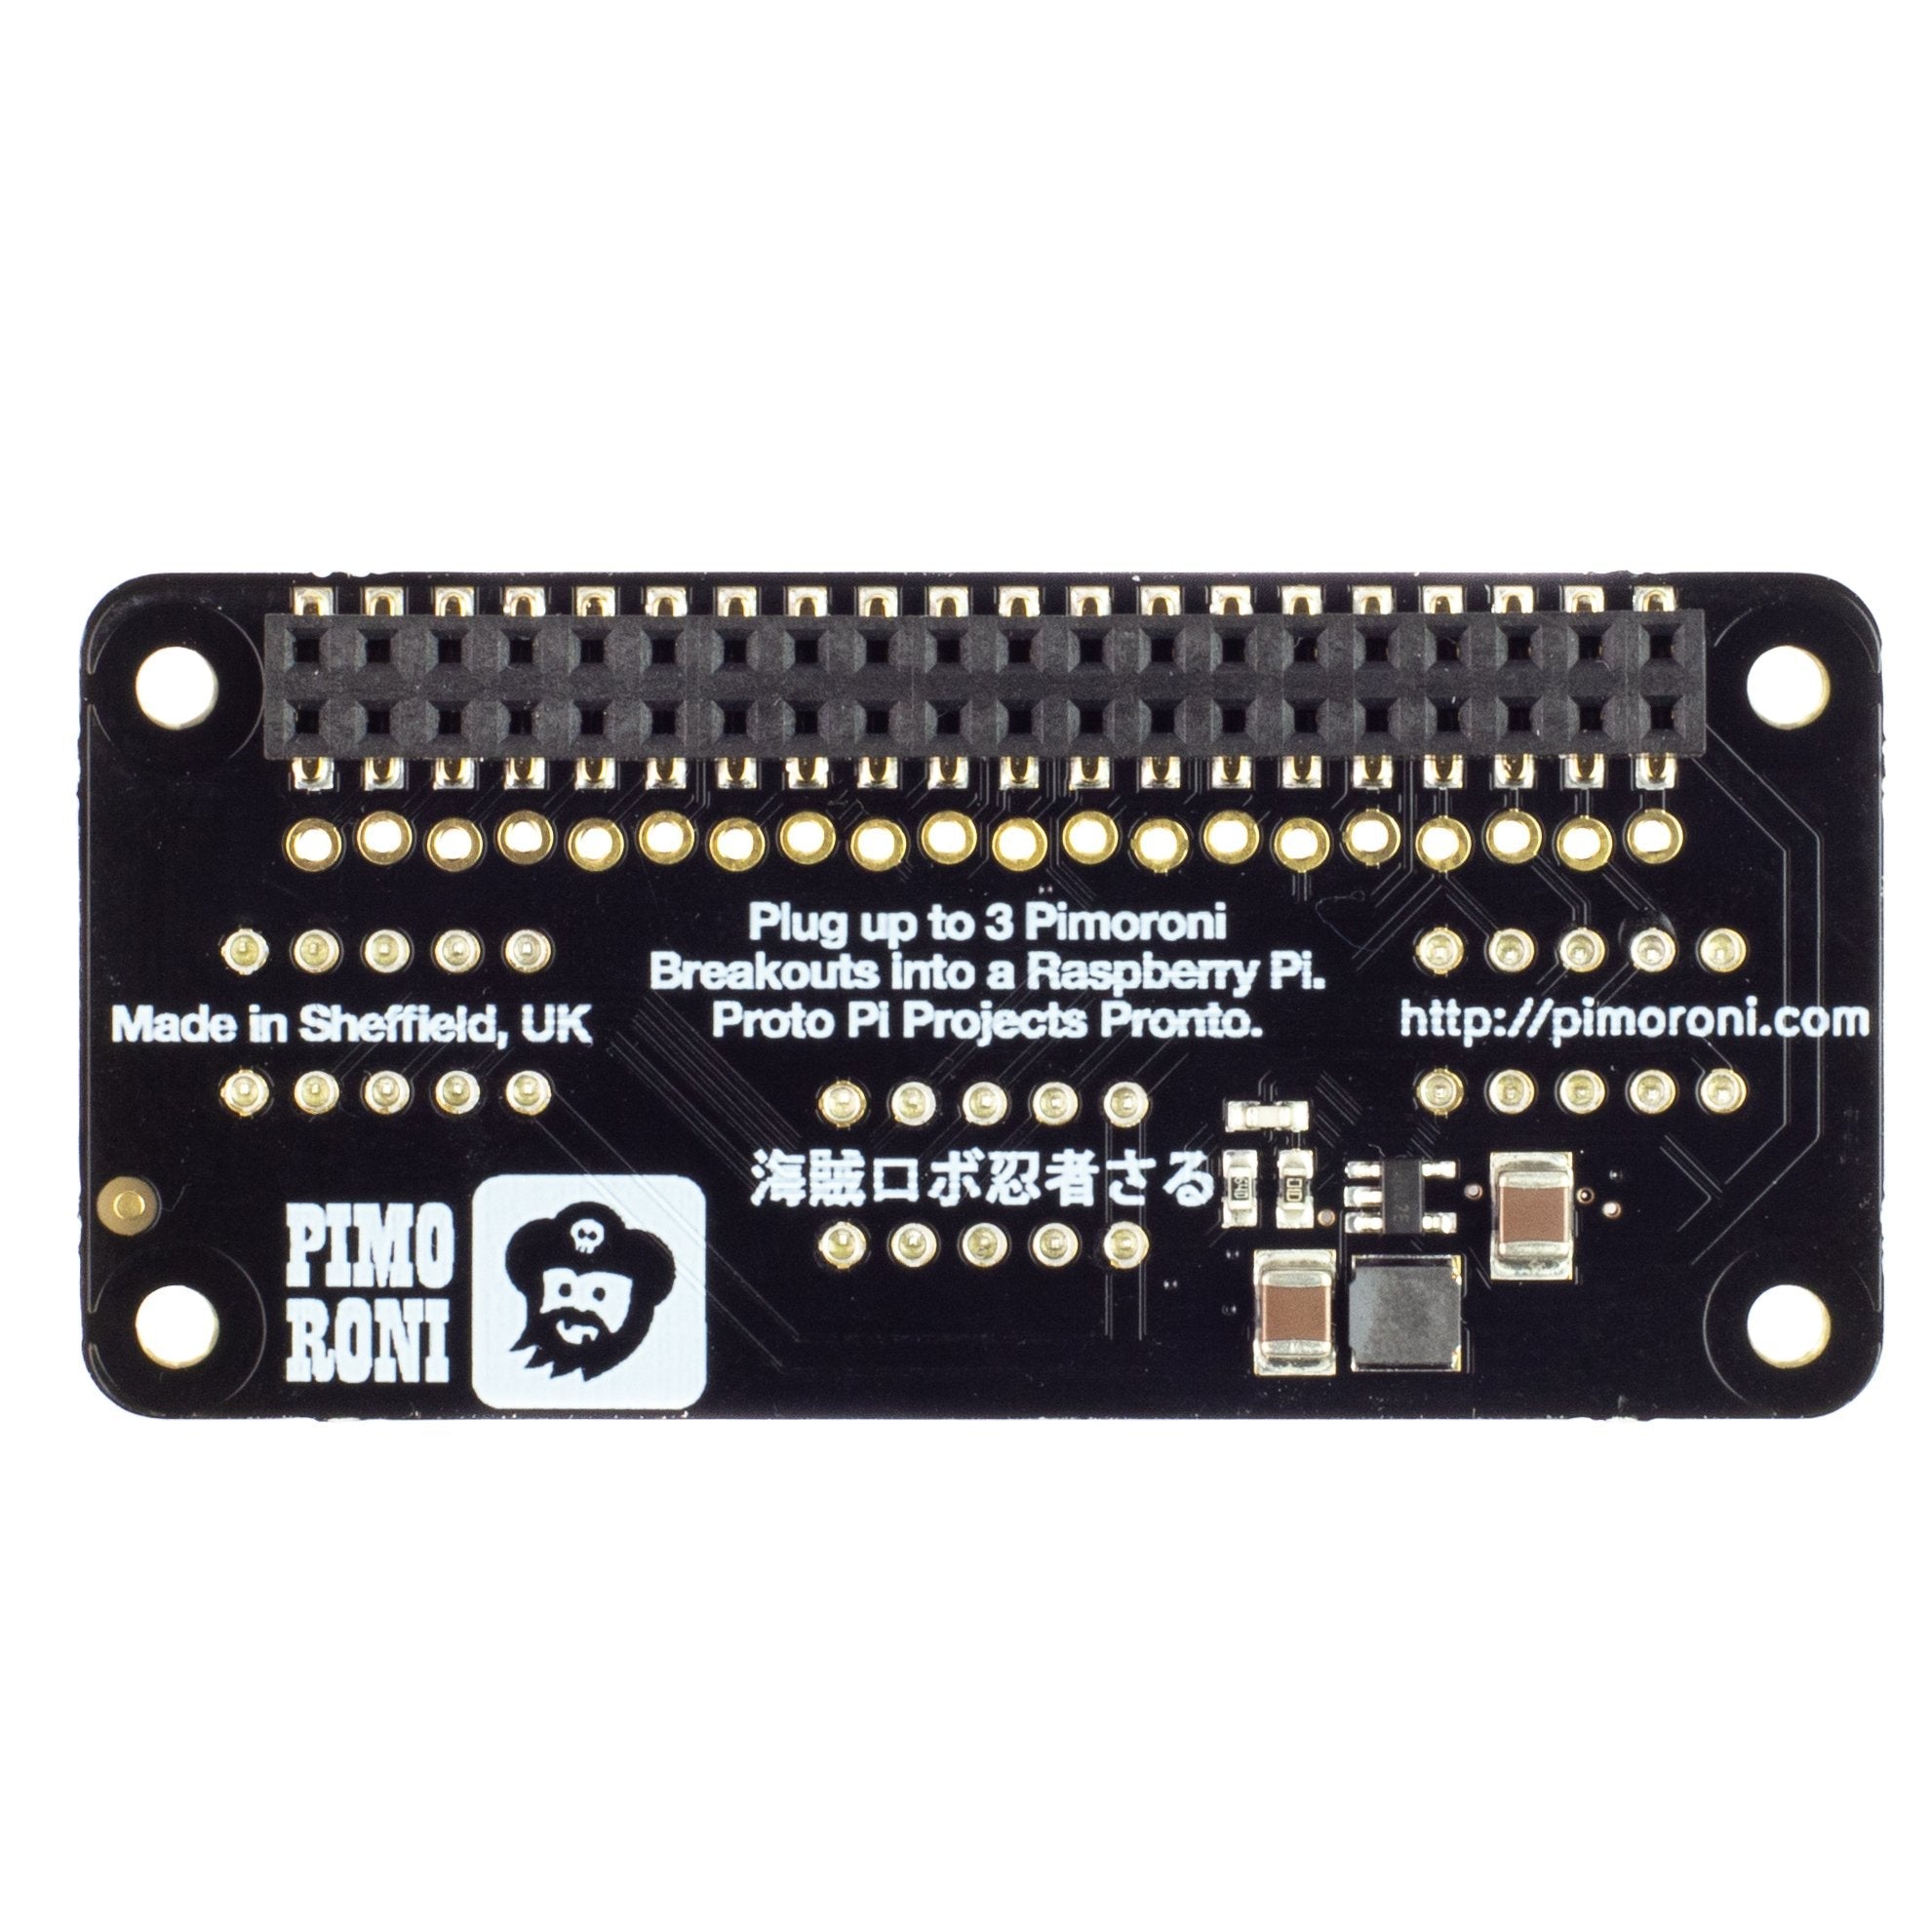
Der einfachste Weg, Breakouts mit Ihrem Raspberry Pi zu verwenden. Sie brauchen nicht zu löten, sondern können einfach bis zu drei Pimoroni-Ausbrüche in die Steckplätze des Breakout Garden Mini und beginnen Sie mit dem Programmieren und Gestalten.
Entwickeln Sie Ihre Projekte mit Breakout Garden. Es ist ideal für Prototyping-Projekte ohne komplizierte Verdrahtung, Löten oder Breadboards, und Sie haben immer die Möglichkeit, Ihr Setup zu ändern, dank der Art, wie Breakout Garden funktioniert.
Die drei robusten Steckplätze des Breakout Garden Mini sind Randstecker, die die fünf Pins auf jedem Pimoroni-Breakout mit den Strom- und I2C-Pins (für Daten) Ihres Raspberry Pi verbinden. Da es sich bei I2C um einen Bus handelt, können Sie mehrere I2C-Geräte gleichzeitig verwenden, vorausgesetzt, sie haben nicht dieselbe Adresse (wir haben dafür gesorgt, dass alle unsere Breakouts unterschiedliche Adressen haben).
Eigenschaften
- Drei robuste Steckplätze für Randstecker Pimoroni-Ausbrüche
- 0,1"-Raster, 5-polige Stecker
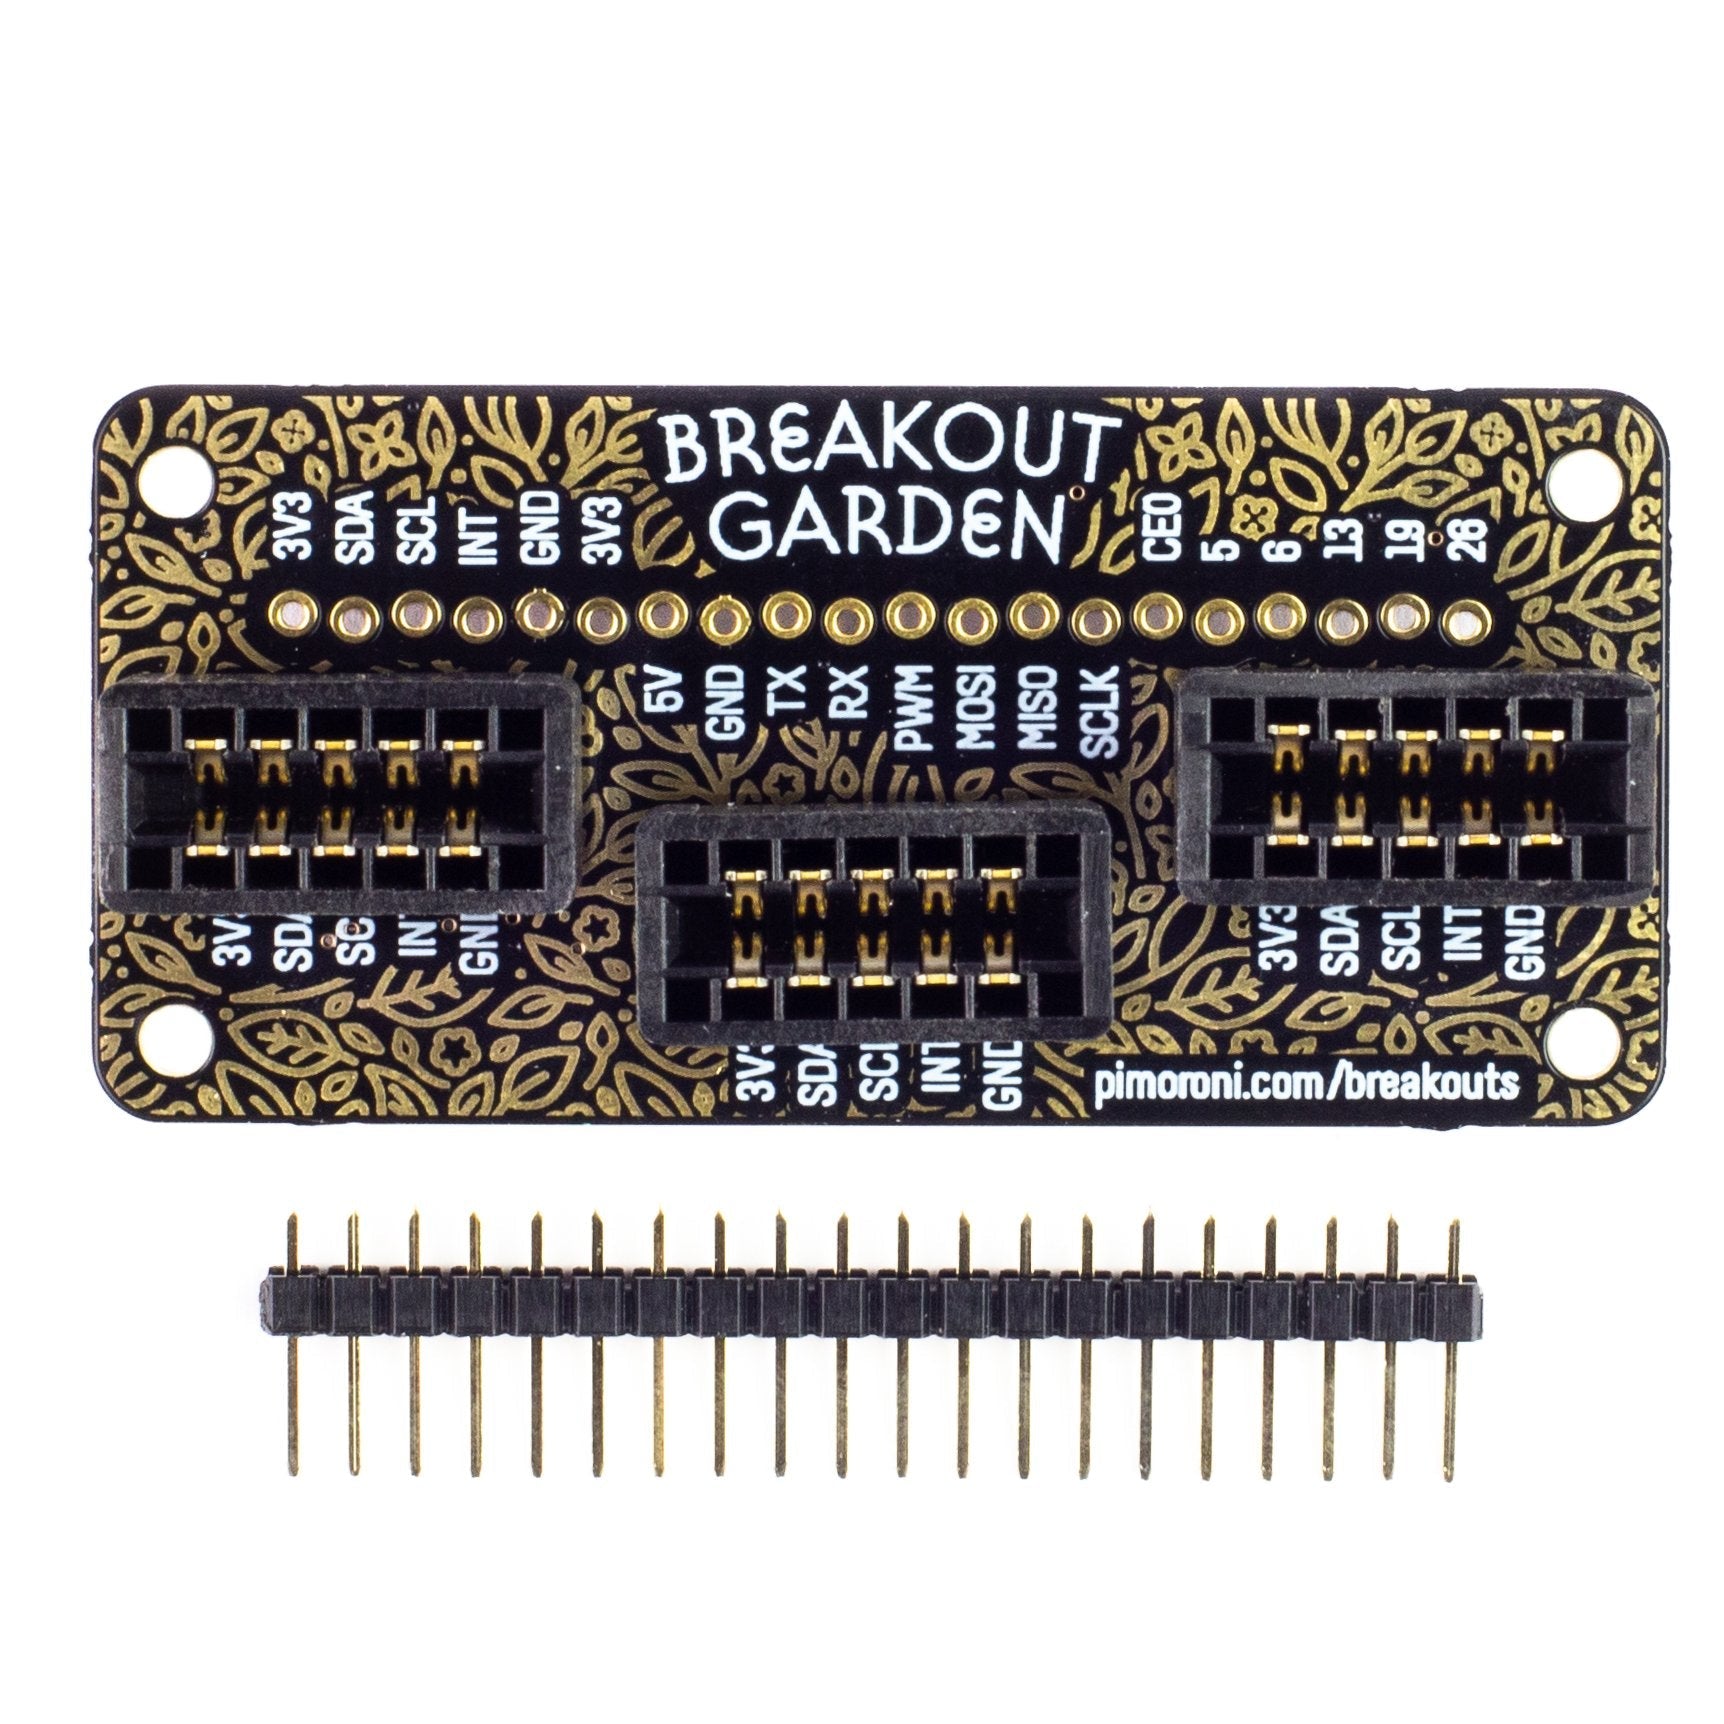
- Ausgebrochene Stifte (1x10 Streifen der Stiftleiste enthalten)
- Verpolungsschutz (in den Breakouts integriert)
- pHAT-Format-Karte
- Kompatibel mit allen Raspberry Pi-Modellen mit 40-Pin-Anschluss
Breakout Garden verwenden
Aufgrund der Art und Weise, wie I2C (das Protokoll, das Breakout Garden verwendet) funktioniert, spielt es keine Rolle, in welchen Slot des Breakout Garden Mini Sie Ihr Pimoroni-Breakout stecken. Jedes I2C-Gerät hat eine Adresse (Sie finden sie auf der Rückseite jedes Breakout), die es verwendet, um sich gegenüber anderen I2C-Geräten zu identifizieren, so dass es Ihrem Raspberry Pi quasi sagt: "Hey, ich bin's, Bob!"
Wir haben einen Verpolungsschutz in unsere Pimoroni-Ausbrüche Das bedeutet, dass es keinen magischen blauen Rauch gibt, wenn Sie versehentlich einen Stecker falsch herum einstecken. Die korrekte Art und Weise, sie einzustecken, besteht darin, sicherzustellen, dass die Beschriftungen der Pins auf Ihrem Breakout und die Beschriftungen auf jedem Breakout Garden Mini-Slot übereinstimmen.
Wir haben auch eine Menge nützlicher Pins an der Oberseite des Breakout Garden Mini angebracht, damit Sie andere Geräte anschließen und in Ihre Breakout Garden-Projekte integrieren können. Wenn Sie über Pimoroni-Ausbrüche an die Sie bereits Header gelötet haben, können Sie diese obere Reihe von Pins verwenden, um sie neben anderen Breakouts auf Breakout Garden Mini zu verwenden.
Software
Besuchen Sie die Breakout Garden GitHub Repo und probieren Sie unser automatisches Installationsprogramm aus. Legen Sie einfach ein paar Breakouts in Breakout Garden Mini ein, führen Sie den Installer aus, und SHAZAM! wird die Software für die entsprechenden Breakouts installiert. Wir haben auch ein paar schöne Beispiele um Ihnen zu zeigen, was möglich ist.
English Description
The easiest way to use breakouts with your Raspberry Pi. There's no soldering required, just pop up to three Pimoroni breakouts into the slots on Breakout Garden Mini and get started coding and creating.
Grow your projects on Breakout Garden. It's ideal for prototyping projects without the need for complicated wiring, soldering, or breadboards, and you've always got the option of changing your setup thanks to the way that Breakout Garden works.
The three sturdy slots on Breakout Garden Mini are edge connectors that connect the five pins on each Pimoroni breakout to the power and I2C (for data) pins on your Raspberry Pi. Because I2C is a bus, you can use multiple I2C devices at the same time, providing they don't have the same address (we've made sure that all of our breakouts have different addresses).
Features
- Three sturdy edge-connector slots for Pimoroni breakouts
- 0.1” pitch, 5 pin connectors
- Broken-out pins (1x10 strip of male header included)
- Reverse polarity protection (built into breakouts)
- pHAT format board
- Compatible with all 40-pin header Raspberry Pi models
Using Breakout Garden
Because of the way that I2C (the protocol that Breakout Garden uses) works, it doesn't matter which slot on Breakout Garden Mini you plug your Pimoroni breakout into. Each I2C device has an address (you'll see it on the back of each breakout) that it uses to identify itself to other I2C devices, so it's effectively saying to your Raspberry Pi, "Hey, it's me, Bob!"
We've built reverse polarity protection into our Pimoroni breakouts, meaning that there's no magic blue smoke if you accidentally plug one in the wrong way round. However, the correct way to plug them in is to make sure that the labels on the pins on your breakout and the labels on each Breakout Garden Mini slot match up.
We've also broken out a load of useful pins along the top of Breakout Garden Mini, so you can connect other devices and integrate them into your Breakout Garden projects. If you have Pimoroni breakouts to which you've already soldered headers, then you can use this top row of pins to use them alongside other breakouts on Breakout Garden Mini.
Software
Head over to the Breakout Garden GitHub repo and give our automagic installer a go. Just pop a few breakouts into Breakout Garden Mini, run the installer, and SHAZAM!, the software for the appropriate breakouts will be installed. We've also got a few nice examples to show you what's possible.
Sicherheitsangaben
- Lesen Sie die Bedienungsanleitung sorgfältig durch, bevor Sie das Produkt verwenden.
- Stellen Sie sicher, dass alle Montage- und Installationsanweisungen des Herstellers sorgfältig befolgt werden.
- Verwenden Sie das Produkt nur für den vorgesehenen Zweck.
- Die unsachgemäße Nutzung dieses Produkts kann zu schweren Verletzungen oder Sachschäden führen.
- Nicht für Kinder unter 10 Jahren geeignet.
- Bei unsachgemäßer Verwendung besteht eine Verletzungsgefahr.
- Dieses Produkt entspricht den geltenden Sicherheitsanforderungen der Europäischen Union.
- Dieses Produkt wurde gemäß der GPSR geprüft, die sicherstellt, dass alle relevanten Sicherheitsanforderungen für Konsumgüter eingehalten werden.
Nachverfolgbarkeitsinformationen
Jedes Produkt verfügt über eines oder mehrere der folgenden Merkmale:
- Ein CE-Kennzeichen, das die Einhaltung der Sicherheits-, Gesundheits- und Umweltschutzanforderungen der Europäischen Union anzeigt.
- Eine eindeutige Serien- oder Chargennummer, um die Nachverfolgbarkeit zu gewährleisten und bei Bedarf Rückrufaktionen zu unterstützen.
- Hersteller- und Importeurangaben für den Kundensupport und Sicherheitsanfragen.
Überwachung und Berichterstattung von Vorfällen
Für den unwahrscheinlichen Fall eines Produktproblems haben wir Verfahren implementiert, um:
- Kundenbeschwerden zeitnah bearbeiten.
- Schwerwiegende Vorfälle über das EU Safety Gate/RAPEX-System melden.
- Mit den Marktüberwachungsbehörden zusammenarbeiten, um die öffentliche Sicherheit zu gewährleisten.
Kontakt:
- Email: support [@] pi3g.com
- Telefon: 0341 / 392 858 40
Dieses Produkt ist vollständig mit allen geltenden EU-Vorschriften konform, um die Sicherheit unserer geschätzten Kunden zu gewährleisten.

